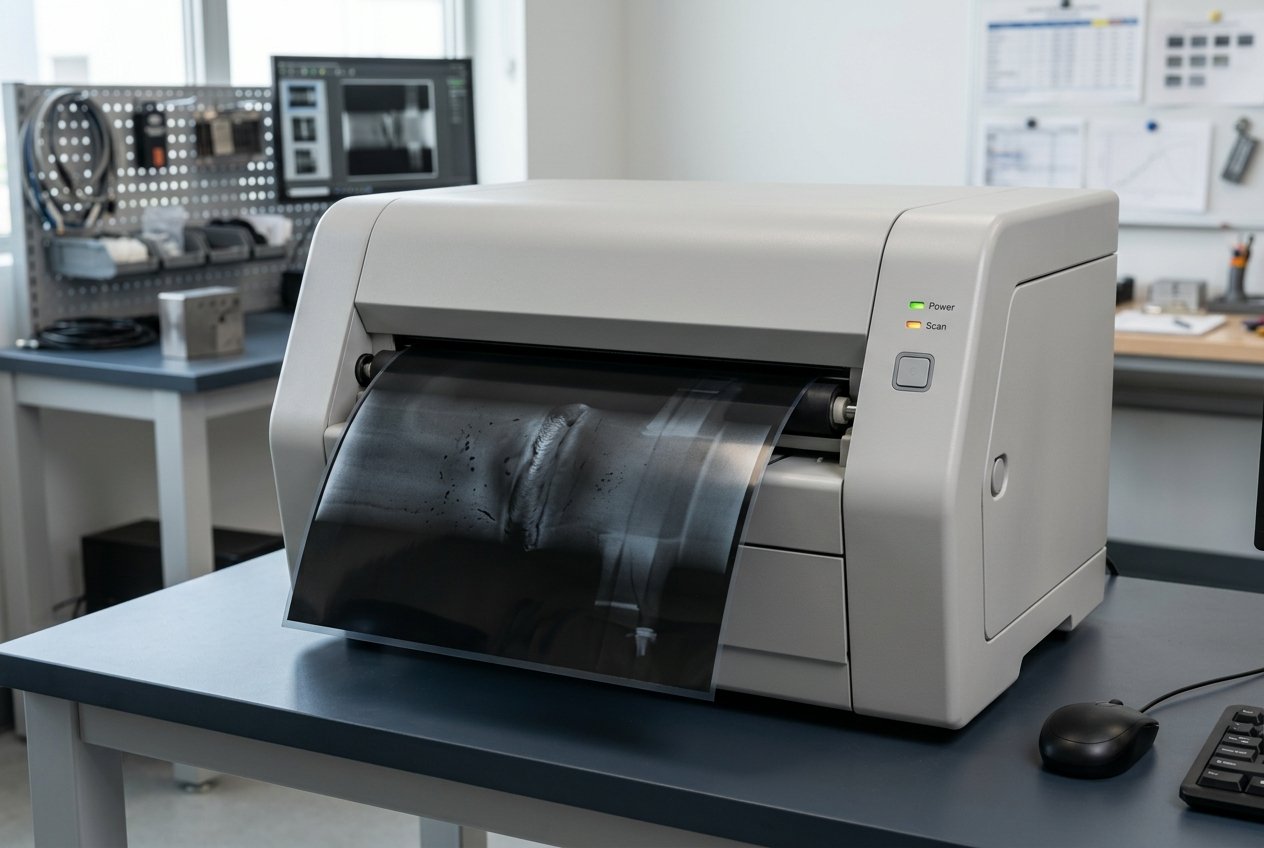
In many manufacturing companies twenty years of technical memory still sits inside envelopes of radiographic film. That film is the proof a weld was accepted, the reference when a component comes back to the shop, the document a customer or a certifying body may request even years later. And it is a medium that ages: the emulsion deteriorates, markers fade, and accessing a single sheet takes time and a film viewer.
Digitizing that film is not a digital fad. It is a way to protect a documentary asset, make it accessible and, when needed, readable again with the same criteria as the original radiograph. But precisely because the goal is re-readability — not a simple archive snapshot — digitization has strict technical rules. Here we go through them, with a practical angle for those who manage quality and non-destructive testing.
Why digitize radiographic film
The reasons add up, and rarely does one alone justify the investment. Preservation is the most obvious: well-kept film lasts a long time, but not forever, and a fire or a flood erases in an hour what was never copied. A digital archive with backups is, quite simply, replicable.
Then there is sharing. A digitized radiograph is sent in seconds to a customer, a third-party inspector or a colleague at another plant, without shipping the original and risking its loss. Anyone working with foreign clients or long supply chains knows the value of attaching the image to a report instead of describing it in words.
The third reason is space, and it should not be underestimated: linear metres of cabinets turning into a folder with backups frees up floor area and cuts management cost. Finally, there is consistency of the record. If new inspections are already digital — with CR or DR systems — keeping the legacy on film means running two separate archives with different search logic. Digitizing the back catalogue brings everything onto a single track.
The economic value: what you actually save
Behind the decision to digitize there is almost always an economic calculation, even when it is never written down. The first saving is space: an archive of films takes up square metres of climate-controlled storage that, once digitized, shrink to a folder on a server with backup copies. In plants where every square metre has a cost, that is not a negligible line item.
The second is time. Retrieving a film from ten years ago can take hours of physical searching; the same image, indexed sensibly, opens in seconds. Multiplied by the requests from customers, bodies and audits over a year, the time recovered adds up to more than it seems.
Then there is the cost you do not see until it happens: film deteriorates, fades, scratches or gets lost. When the original is no longer readable and no copy exists, the only option is to shoot the radiograph again — where still possible — with new exposure costs, machine time and source handling. A faithful digital copy removes that risk at the root.
Finally, the value of long-term preservation: many sectors require inspection records to be kept for years, sometimes for the entire life of the component. A digital archive in a standard format with redundant backups ensures compliance without depending on the integrity of an ageing physical medium — the same principle for which the DICONDE format was created to last over time. In short, digitizing is not an IT expense: it turns a fragile, costly-to-keep archive into an asset that is searchable, shareable and time-proof.
Digitizing film is not going digital
This is a distinction that causes a lot of confusion in requests for quotation. A film digitizer converts an already exposed and processed film into a numeric image: it works on the existing medium and does not change how inspections are performed. Going digital, instead, means changing the acquisition method upstream, adopting digital radiography systems that no longer use film.
The two routes answer different needs and often coexist. The digitizer serves to recover and protect what has already been produced on film; the move to photostimulable phosphors (CR) or flat-panel detectors (DR) concerns new inspections, productivity and dose. Anyone weighing both directions will find a dedicated comparison in our guide on CR and DR in industrial radiography, while detector selection for new acquisitions is covered in the deep dive on DR detectors for weld inspection. In this article we stay on the first topic: the film already exists, and it must be brought to image without losing information.
How a radiographic film scanner works
The principle is to measure, point by point, how much light passes through the film. Where the film is more blackened (high optical density) little light passes; where it is lighter, more does. Translating this transmission into a numeric value for each pixel reconstructs the grey-scale radiographic image. The difference between technologies lies in how the film is illuminated and in how the transmitted light is measured.
Laser digitizers
In laser-scanning systems a focused beam sweeps the film line by line (flying spot). The light passing through the film is collected by a photomultiplier, a very sensitive detector with a wide dynamic range. This architecture excels exactly where industrial films are most demanding: the very dark, high-optical-density areas. That is why laser digitizers are traditionally the reference standard when high-Dmax film has to be read again for interpretation, not just for archiving.
CCD/CMOS digitizers
In sensor-based systems the film is illuminated diffusely and the transmitted light is collected by a bar or matrix of CCD or CMOS elements. They are generally faster and cheaper, and have made great progress on dynamic range. The historic critical point remains the ability to read the highest optical densities cleanly: beyond a certain threshold noise rises and information in the dark areas smears together. For archives with moderate densities they can be more than adequate; to re-read heavily exposed film, careful checks on the specifications are needed.
The four parameters that decide quality
A film digitizer is judged on the balance between four quantities. Looking at just one leads to the same mistakes made when choosing a detector on pixel pitch alone.
Spatial resolution (µm or dpi)
This is the pixel size at the film plane, expressed in microns or, equivalently, in dots per inch. A 50 µm pixel corresponds to about 508 dpi, a 100 µm pixel to about 254 dpi: the smaller the pixel, the finer the detail that can be sampled. But useful resolution is not the sensor's in the absolute, rather the one needed not to lose the indications present on the original film. Digitizing at too low a resolution erases fine flaws; choosing an excessive resolution inflates files without adding real information, because the limit is still the grain and sharpness of the source film.
Grey-scale depth (bits per pixel)
This is the number of grey levels the system distinguishes. At 8 bits the levels are 256, far too few for an industrial radiograph; at 12 bits they become 4,096, at 16 bits 65,536. A radiograph contains very fine density transitions, and enough levels are needed to avoid "banding" the grey scale and to adjust window and contrast during reading without introducing artefacts. For interpretive use, high depth is not a luxury: it is what allows the image to be processed after acquisition.
Maximum optical density (Dmax)
Optical density measures how blackened the film is, on a logarithmic scale: each additional unit means ten times less transmitted light. Industrial films often work at high densities, and some procedures allow values around 4.0 and above. If the scanner does not "see" up to that Dmax, the darkest areas — which may hold precisely the critical information — remain black and detail-free. The Dmax readable by the digitizer is perhaps the most underestimated parameter in quotations, and the one that distinguishes a system meant for interpretation from one suited only to documentary archiving.
Signal-to-noise ratio (SNR)
Even with adequate resolution and Dmax, a noisy digitizer makes it hard to tell a small density difference — that is, a flaw — from system noise. SNR governs contrast sensitivity, the ability to detect minimal density variations. It is the parameter that, together with Dmax, decides whether the digitized image is truly re-readable with the same rigour as the original, or merely "viewable".
What ISO 14096 asks for
Film digitization is not left to common sense. The standard ISO 14096 — Non-destructive testing — Qualification of radiographic film digitisation systems — is the international reference for qualifying digitization systems. It defines how to measure image-quality parameters (spatial resolution, contrast sensitivity, density range, noise) and sets minimum requirements, distinguishing different qualification levels according to the intended use of the image.
The logic is simple and worth keeping in mind: it is one thing to digitize in order to interpret the radiograph on screen with the same validity as reading it on the film viewer; it is another to digitize in order to archive, that is, to keep a faithful copy without necessarily replacing the original reading. Quality requirements are stricter in the first case. Defining from the start what the digitization is for — interpretation or archive — is what correctly steers the choice of parameters and scanner, and avoids buying more (or less) than needed.
Qualification also relies on standardized references: for example the practice ASTM E1936 defines a reference radiograph for evaluating the performance of digitization systems. Periodically verifying the system with these tools, and documenting the outcome, is part of a digitization process that holds up under audit.
Managing the archive: metadata, formats and DICONDE
An image file without context is half the job. A digitized radiograph is truly valuable when it carries the information that makes it findable and interpretable years later: component, material, thickness, procedure, source, operator, result, date. This is where the question of format comes in.
For this the non-destructive testing world has adopted the DICONDE standard, defined by the practice ASTM E2339. It is the NDE adaptation of the medical DICOM format, managed by NEMA, which for decades has guaranteed interoperability and long-term preservation of diagnostic images. DICONDE encapsulates image and metadata in a single standardized container: the archive stays usable even when the acquisition software changes, and images travel between different systems without losing the associated information. For an archive that must last as long as a plant's service life, this independence from a single software vendor is a requirement, not a detail.
Alongside the format, workflow choices matter: a consistent naming convention, an archive structure designed for search, a backup policy with redundant copies and, where required, traceability of operations. Digitizing without organizing the archive simply moves the clutter from paper to disk.
Practical selection criteria
Translated into a purchasing decision, a few questions separate an adequate system from an oversized or insufficient one.
- Purpose: interpretation or archive only? This choice dictates the quality class and, downstream, everything else.
- Optical density of the film stock: how heavily exposed is the film to be digitized? The scanner's readable Dmax must cover the archive's real values with margin.
- Film format and volume: maximum sizes handled and the number of sheets to process steer between benchtop solutions and high-throughput systems.
- Useful resolution: the finest indication to preserve determines the minimum pixel needed, without chasing dpi the film does not contain.
- Consistency with the existing workflow: compatibility with the analysis software, export to open formats and DICONDE support for the archive.
- Qualification and verification: the ability to qualify the system to ISO 14096 and to run documentable periodic checks.
Common mistakes
- digitizing everything at the same resolution, ignoring that purpose and quality class should drive it;
- choosing the scanner on dpi alone, neglecting Dmax and SNR;
- underestimating the real density of archive film and ending up with unreadable dark areas;
- saving only the image without metadata, making the archive hard to search;
- adopting a closed proprietary format, tying the archive to a single software for its lifetime;
- failing to plan redundant backups or a periodic system verification.
When it is really worth it
Digitizing an archive is an investment that pays off when there is a concrete reason: multi-year retention obligations, the need to share images with customers or bodies, the risk of degradation or loss of the physical medium, the will to unify legacy records with new digital acquisitions. If none of these drivers is present, one can proceed selectively, digitizing first what has documentary value or is most at risk.
The underlying criterion remains that of radiography itself: the quality of the final image cannot be better than the information contained in the source film, but a poorly done digitization can easily be worse. Setting up purpose, parameters, qualification and archive correctly is what turns a stack of film into a technical asset that is consultable — and defensible.
If you are evaluating how to recover a film archive or how to integrate it with new acquisitions, it is worth starting from film digitization systems and from an honest look at your film stock: density, formats, volumes and intended use. From there the technical choice becomes straightforward.